Friday, 17 October 2014

Install GD library and freetype on Linux

Installing GD :

For CentOS / RedHat / Fedora :
sudo yum install php-gd
For Debian/ubuntu :
sudo apt-get install php5-gd

Installing freetype :

For CentOS / RedHat / Fedora :
sudo yum install freetype
For Debian/ubuntu :
sudo apt-get install freetype*


Ubuntu Linux: Install or Add PHP-GD Support To Apache Web Server


# apt-get install php5-gd
OR
$ sudo apt-get install php5-gd
Sample outputs (from my Debian server)
apt-get install php5-gd
Reading package lists... Done
Building dependency tree
Reading state information... Done
The following extra packages will be installed:
  libgd2-xpm
Suggested packages:
  libgd-tools
The following packages will be REMOVED:
  libgd2-noxpm
The following NEW packages will be installed:
  libgd2-xpm php5-gd
0 upgraded, 2 newly installed, 1 to remove and 7 not upgraded.
Need to get 270 kB of archives.
After this operation, 176 kB of additional disk space will be used.
Do you want to continue [Y/n]? y
Get:1 http://debian.osuosl.org/debian/ squeeze/main libgd2-xpm amd64 2.0.36~rc1~dfsg-5 [231 kB]
Get:2 http://security.debian.org/ squeeze/updates/main php5-gd amd64 5.3.3-7+squeeze9 [39.1 kB]
Fetched 270 kB in 2s (124 kB/s)
dpkg: libgd2-noxpm: dependency problems, but removing anyway as you requested:
 libgvc5 depends on libgd2-noxpm (>= 2.0.36~rc1~dfsg) | libgd2-xpm (>= 2.0.36~rc1~dfsg); however:
  Package libgd2-noxpm is to be removed.
  Package libgd2-xpm is not installed.
(Reading database ... 206928 files and directories currently installed.)
Removing libgd2-noxpm ...
Selecting previously deselected package libgd2-xpm.
(Reading database ... 206919 files and directories currently installed.)
Unpacking libgd2-xpm (from .../libgd2-xpm_2.0.36~rc1~dfsg-5_amd64.deb) ...
Setting up libgd2-xpm (2.0.36~rc1~dfsg-5) ...
Selecting previously deselected package php5-gd.
(Reading database ... 206930 files and directories currently installed.)
Unpacking php5-gd (from .../php5-gd_5.3.3-7+squeeze9_amd64.deb) ...
Processing triggers for libapache2-mod-php5 ...
Reloading web server config: apache2.
Setting up php5-gd (5.3.3-7+squeeze9) ...
Finally, restart the Apache 2 web serer, enter:
# /etc/init.d/apache2 restart
You can test your php application.

How do I verify that php5-gd support loaded or not?

Type the following command:
$ php5 -m | grep -i gd
Sample outputs:
gd
OR
$ php5 -i | grep -i --color gd
OR
$ php -i | grep -i --color gd
Sample outputs:
Additional .ini files parsed => /etc/php5/cli/conf.d/gd.ini,
gd
GD Support => enabled
GD Version => 2.0
gd.jpeg_ignore_warning => 0 => 0
XAUTHORITY => /var/run/gdm3/auth-for-vivek-ruJHl1/database
_SERVER["XAUTHORITY"] => /var/run/gdm3/auth-for-vivek-ruJHl1/database
You can also use the following php code. Create a file called test.php and put in your web server directory i.e. Apache DocumentRoot (such as /var/www):
 
<?php
  phpinfo();
?>
 
Run it as follows:
http://your-server-ip/test.php AND ADD EXTENSION IN PHP.INIextension = gd.so


Virtual Hosts Ubuntu 14.04 (Name based)


sudo apt-get update
sudo apt-get install apache2

After these steps are complete, we can get started.

Create Directory in /var/www/html

mkdir indianictest.com  

and one another directory in indianictest.com

mkdir public_html


Step One — Create the Directory Structure

The first step that we are going to take is to make a directory structure that will hold the site data that we will be serving to visitors.

Our document root (the top-level directory that Apache looks at to find content to serve) will be set to individual directories under the /var/www directory. We will create a directory here for both of the virtual hosts we plan on making.

Within each of these directories, we will create a public_html file that will hold our actual files. This gives us some flexibility in our hosting.

For instance, for our sites, we're going to make our directories like this:

sudo mkdir -p /var/www/html/indianictest.com/public_html
The portions in red represent the domain names that we are wanting to serve from our VPS.

Step Two — Grant Permissions

Now we have the directory structure for our files, but they are owned by our root user. If we want our regular user to be able to modify files in our web directories, we can change the ownership by doing this:

sudo chown -R $USER:$USER /var/www/html/indianictest.com/public_html

The $USER variable will take the value of the user you are currently logged in as when you press "ENTER". By doing this, our regular user now owns the public_html subdirectories where we will be storing our content.
We should also modify our permissions a little bit to ensure that read access is permitted to the general web directory and all of the files and folders it contains so that pages can be served correctly:

sudo chmod -R 755 /var/www/html
Your web server should now have the permissions it needs to serve content, and your user should be able to create content within the necessary folders.

Step Three — Create Demo Pages for Each Virtual Host

We have our directory structure in place. Let's create some content to serve.
We're just going for a demonstration, so our pages will be very simple. We're just going to make an index.html page for each site.
Let's start with example.com. We can open up an index.html file in our editor by typing:

nano /var/www/example.com/public_html/index.html
In this file, create a simple HTML document that indicates the site it is connected to. My file looks like this:
<html>
 <head>
   <title>Welcome to Example.com!</title>
 </head>
 <body>
   <h1>Success!  The example.com virtual host is working!</h1>
 </body>
</html>
Save and close the file when you are finished.

Virtual host files are the files that specify the actual configuration of our virtual hosts and dictate how the Apache web server will respond to various domain requests.
Apache comes with a default virtual host file called 000-default.conf that we can use as a jumping off point. We are going to copy it over to create a virtual host file for each of our domains.
We will start with one domain, configure it, copy it for our second domain, and then make the few further adjustments needed. The default Ubuntu configuration requires that each virtual host file end in .conf.

Create the First Virtual Host File

Start by copying the file for the first domain:

sudo cp /etc/apache2/sites-available/000-default.conf /etc/apache2/sites-available/indianictest.com.conf

Open the new file in your editor with root privileges:

sudo nano /etc/apache2/sites-available/indianictest.com.conf

The file will look something like this (I've removed the comments here to make the file more approachable):
<VirtualHost *:80>
   ServerAdmin webmaster@localhost
   DocumentRoot /var/www/html
   ErrorLog ${APACHE_LOG_DIR}/error.log
   CustomLog ${APACHE_LOG_DIR}/access.log combined
</VirtualHost>
As you can see, there's not much here. We will customize the items here for our first domain and add some additional directives. This virtual host section matches any requests that are made on port 80, the default HTTP port.
First, we need to change the ServerAdmin directive to an email that the site administrator can receive emails through.
ServerAdmin admin@example.com
After this, we need to add two directives. The first, called ServerName, establishes the base domain that should match for this virtual host definition. This will most likely be your domain. The second, called ServerAlias, defines further names that should match as if they were the base name. This is useful for matching hosts you defined, like www:
ServerName example.com
ServerAlias www.example.com
The only other thing we need to change for a basic virtual host file is the location of the document root for this domain. We already created the directory we need, so we just need to alter the DocumentRoot directive to reflect the directory we created:
DocumentRoot /var/www/example.com/public_html
In total, our virtualhost file should look like this:
       ServerAdmin webmaster@indianictest.com
       ServerName indianictest.com
       ServerAlias www.indianitest.com
       DocumentRoot /var/www/html/indianictest.com/public_html
       ErrorLog ${APACHE_LOG_DIR}/error.log
       CustomLog ${APACHE_LOG_DIR}/access.log combine

Save and close the file.

Step Five — Enable the New Virtual Host Files

Now that we have created our virtual host files, we must enable them. Apache includes some tools that allow us to do this.
We can use the a2ensite tool to enable each of our sites like this:

sudo a2ensite indianictest.com.conf

When you are finished, you need to restart Apache to make these changes take affect:
sudo service apache2 restart
You will most likely receive a message saying something similar to:
* Restarting web server apache2
AH00558: apache2: Could not reliably determine the server's fully qualified domain name, using 127.0.0.1. Set the 'ServerName' directive globally to suppress this message
This is a harmless message that does not affect our site.


Step Six — Set Up Local Hosts File (Optional)

If you haven't been using actual domain names that you own to test this procedure and have been using some example domains instead, you can at least test the functionality of this process by temporarily modifying the hosts file on your local computer.
This will intercept any requests for the domains that you configured and point them to your VPS server, just as the DNS system would do if you were using registered domains. This will only work from your computer though, and is simply useful for testing purposes.
Make sure you are operating on your local computer for these steps and not your VPS server. You will need to know the computer's administrative password or otherwise be a member of the administrative group.
If you are on a Mac or Linux computer, edit your local file with administrative privileges by typing:

sudo nano /etc/hosts

Save and close the file.


Step Seven — Test your Results

Now that you have your virtual hosts configured, you can test your setup easily by going to the domains that you configured in your web browser:
http://example.com
You should see a page that looks like this:
Apache virt host example

How to fix Apache – "Could not reliably determine the server’s fully qualified domain name, using 127.0.1.1 for ServerName" Error on Ubuntu


You might probably faced the same following error while you were restarting the Apache server on Ubuntu.

aslam@aslam:~$ sudo /etc/init.d/apache2 restart

* Restarting web server apache2                                                
... waiting apache2: Could not reliably determine the server's fully qualified domain name, using 127.0.1.1 for ServerName
To fix that problem, you need to edit the httpd.conf file. Open the terminal and type,
sudo gedit /etc/apache2/httpd.conf
By default httpd.conf file will be blank. Now, simply add the following line to the file.

ServerName localhost( ipaddress )
Save the file and exit from gEdit. Finally restart the server.

sudo /etc/init.d/apache2 restart
sudo nano /etc/hosts   and
10.2.1.30  indianictest.com
10.2.1.30  ind33


Node Js Ubuntu 13.04


How to Install node.js


1. Open Terminal

2. Enter these commands


sudo apt-get update


3. Enter your password ( Password uses to login Ubuntu OS )


sudo apt-get install python-software-properties python g++ make


4. Install Python on your system


sudo add-apt-repository ppa:chris-lea/node.js


5. Update software repository  , because we add a new software package


                                                      sudo apt-get update


6. Install node.js


                                                sudo apt-get install nodejs


Check node.js version


Enter this command
nodejs  --version


Installing PostgreSQL Ubuntu


Postgresql ubuntu 13.04


Installing PostgreSQL

By default PostgreSQl is available in Ubuntu repository. To install PostgreSQL in Ubuntu Server 13.10 is simple, just run the following commands:
sudo apt-get update
sudo apt-get install postgresql

You can also install postresql by adding the following PPA.
sudo apt-get install python-software-properties
sudo add-apt-repository ppa:pitti/postgresql
sudo apt-get update
sudo apt-get install postgresql

If you’re getting an  error message, make sure you already install libpq-dev.The libpq-dev package is for compiling wrappers/clients against libpq.
sudo apt-get install postgresql-9.1 libpq-dev

Configuring PostgreSQL

Enabling TCP connections. By default TCP/IP connections  is disabled due to which users will not be able to access remotely PostgreSQL server from another computers. to enable it edit file
/etc/postgresql/9.1/main/postgresql.conf.

sudo nano /etc/postgresql/9.1/main/postgresql.conf

Change “#listen_addresses = localhost” to “listen_addresses =192.168.1.8″ it allowing remote access only from specific ip address, if you want  remote access from any computers in your network set “localhost to listen_addresses =’*’ “

uncomment #password_encryption = on to password_encryption = on

Save and exit ( Ctrl + O, Ctrl + X), Restart postgreSQl daemon:

sudo /etc/init.d/postgresql restart

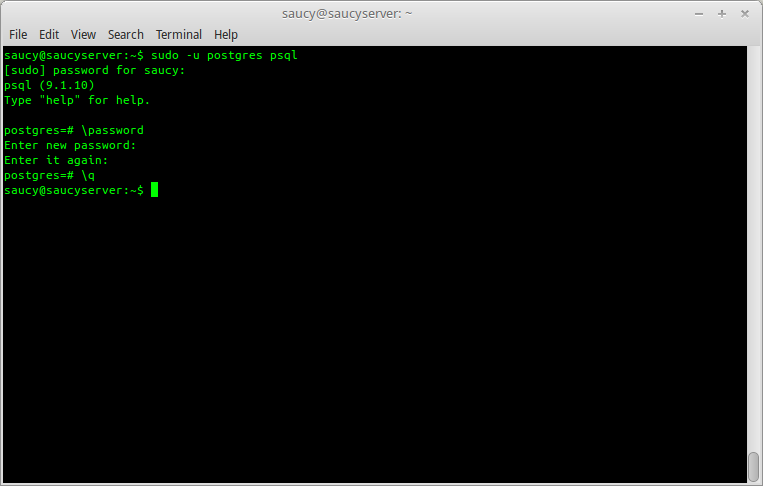
After editing  file /etc/postgresql/9.1/main/postgresql.conf. you need to setup the root password PostgreSQL. In PostgreSQL, root user is postgres which by default, does not have any password. Enter following line in terminal to set a password for the default root user postgres:
$ sudo -u postgres psql
saucy@saucyserver-_181.png
Now psql will ask for a new password twice. Enter the new password and continue. Type ‘\q’ and hit enter to quit.

To create a database the following command can be run from the terminal:

$ sudo -u postgres createdb mydb

Installing and Configuring PhpPgAdmin

phpPgAdmin is a php-based web application that provides a GUI interface for the postgresql. It performs a similar function to phpMyAdmin, which allows users to manipulate database information in a visual program in MySQL.

Execute the following command to installing PhpPgadmin in ubuntu server:

sudo apt-get install phppgadmin

By default you can only access phppgadmin locally. If you want to access remotely from another computers change the following file:

sudo nano /etc/apache2/conf.d/phppgadmin

Comment out the line:
127.0.0.0/255.0.0.0 allow from :: 1/128

uncomment the line:
allow from all

Create a symbolic link /var/www/phppgadmin which would point to /usr/share/phppgadmin
sudo ln -s /usr/share/phppgadmin /var/www/

Restart apache2 daemon:
sudo service apache2 restart

Probably when trying to log into phppgadmin you receive the following message Login
disallowed for security Reasons and this can be solved by changing a configuration variable in Archiving below

sudo nano /usr/share/phppgadmin/conf/config.inc.php

By default comes as :
$conf['extra_login_security']= true;
just switch to :
$conf['extra_login_security']=false;

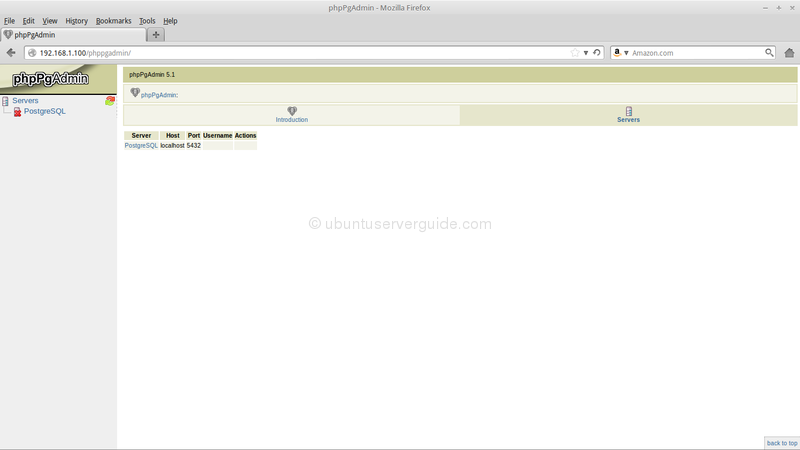
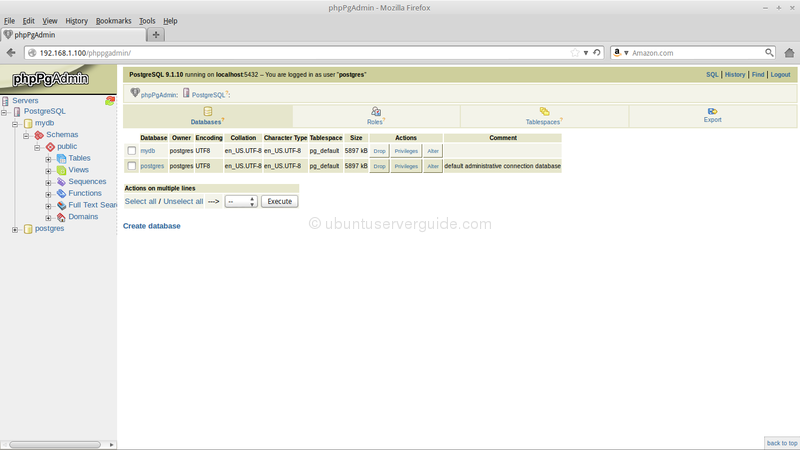
Now, Access phpPgadmin using web browser from any computer in your network by typing in address bar http://host_or_ip/phppgadmin/. You should be able to login using any users you’ve setup in PostgreSQL. It will be appear like the following screenshot:


k1.png
k2.png

k3.png

if loging failed

$ sudo nano /etc/postgresql/9.1/main/pg_hba.conf

# Database administrative login by Unix domain socket
local   all             postgres                                ident (local all postgres ident)

# TYPE  DATABASE        USER            ADDRESS                 METHOD

# "local" is for Unix domain socket connections only
local   all             all                                     peer
# IPv4 local connections:
#host    all             all             127.0.0.1/32            md5
host     all             all             10.2.0.0/16             md5
# IPv6 local connections:
host    all             all             ::1/128                 md5
# Allow replication connections from localhost, by a user with the
# replication privilege.
#local   replication     postgres                                peer
#host    replication     postgres        127.0.0.1/32            md5
#host    replication     postgres        ::1/128                 md5


The response of staff is correct, but if you want to further automate can do:
$ sudo -u postgres psql -c "ALTER USER postgres PASSWORD 'postgres';"
Done! You saved User = postgres and password = postgres.

sudo /etc/init.d/postgresql restart

sudo /etc/init.d/apache2 start

if page not found in browser

sudo cp /etc/apache2/conf.d/phppgadmin /etc/apache2/conf-enabled/phppgadmin.conf
sudo /etc/init.d/apache2 restart